
How to make your own Skyboxes for Unity
A skybox is an image (or collection of images) used in a game engine to create the illusion of a non ending world or environment. As stated Skyboxes are illusions, and do not have any physical properties like collision detection or any 3D mesh at all. They are simply rendered into the scene in a few small draw calls before your actual scene geometry is. Skyboxes range from just about any style from simplistic brown to blue color gradients like the default sky in Unity5, to stunning nature landscapes and even highly detailed city environments. There are many skybox kits out there you can purchase like:
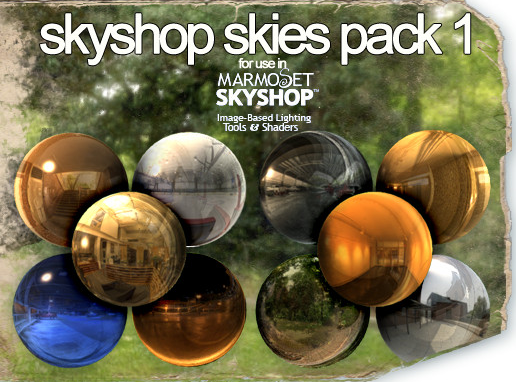
Skyshop Skies Pack 1 by Quantum Theory Entertainment at asset store which works with Skyshop by Marmoset Co.
AllSky by RPGWhiteLock at assets store which is just stunning too

While these are complete solutions for Skies in Unity, many of you want to know what it takes to make your own. Well in this post I’m going to give you a step by step guide to how you can do just that. I’m going to use Adobe Photoshop, a Photoshop plugin called flexify 2, and Unity 5. In particular I’m going to show my workflow for making faceted skies which work well with low poly or cartoon style games, however you will be able to apply the same workflow to making photorealistic skies too.
But before we delve into the tutorial, I want to talk a bit about some other things skies can do for you in Unity. You see, not only do skyboxes provide a scenery to look at for the backdrop of your scenes in Unity, they can also provide directional ambient lighting for your scene. This all started back in Unity 4 when Marmoset Co released Skyshop. Skyshop took the concept of skyboxes and married it with the concept of Image Based Lighting shader support in Unity. With Image based lighting, the materials applied to your meshes could be lit with a combination of direct lighting from things like point lights, spot lights and directional lights in combination with an Image Based Lighting cubemap. This ground breaking concept in Unity actually won the 2013 technical achievement award from Unity. It changed everything, people were able to put reflections of the skyline in their models and it made things look even more real than before. Marmoset even took it a step further and made zone/region specific areas which would reflect certain things in certain regions of your level. They also added support for HDR images so the effects were even more stunning and photorealistic.
Then Unity 5 came out and stole their thunder so to speak. Unity 5 introduced a whole new approach to lighting in your scenes. They took what used to be a complex process and really simplified the steps needed to make skies integrate into the scene. Now you simply open the lighting panel in Unity for your scene and all of the settings you need are there in one place. You still have access to do the things you did in the Unity 4 generation, but now it’s all in one control panel. In addition to that, they introduced the Standard Shader and reflection probes which now offered all Unity users the basic feature set you would find in Marmoset’s Skyshop. Granted, the new features were basic in comparison to what you can still do with Skyshop, but that is really beyond the scope of this article.
The big takeaway here is that now with Unity 5, everyone has access to the basic tools they need to make a simple skybox solution that not only looks nice, but provides Directional ambient light, Image Based Lighting for specular reflections but also support for reflection probes to define regions of reflection areas in your scene.
Lets move forward!!
The first thing you want to do is open Unity 5 and create a new scene. Now, go to “Window/Lighting” in your top menu, you will get an editor window that looks something like this:

Here you can see how Unity is going to treat the overall lighting settings in your scene. Please note that I keep using the word scene, as these lighting settings are specific to each scene of your game, so you can have different lighting settings at the scene level. Specifically, let’s pay attention to the top section which is the Environment Lighting group. Each of the settings here plays a role in how your skybox will affect your scene. By default, Unity will use the “Default Sky” material in the Skybox option, which is the standard brown to blue desert style sky you see all the time. This default sky is nice and all, but its probably not what you will use in your game.
The Skybox option allows you so specify the material you want to use which will be rendered as the backdrop of your scene, this material needs to be previously created and ready to simply drop or select. (if you downloaded my kit, you will find a collection of these materials already created in the “Skyboxes” folder). If you changed the skybox option right now, you would see an immediate change in your scene whereby the who attitude of your game dramatically changes.
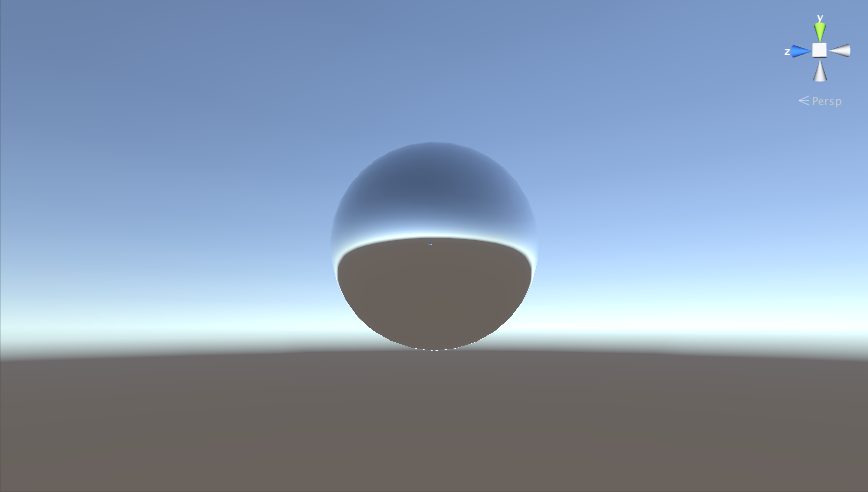
Before:
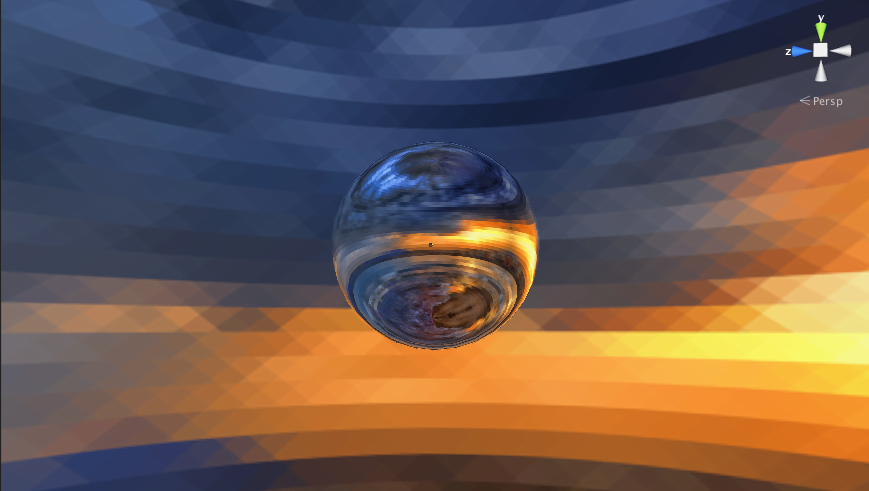
After:

You will notice that I have a simple sphere in this scene which is reflecting the skybox. I achieved this by 1) placing a highly reflective/metallic material on that sphere and 2) applying a reflection probe around that sphere. Now if I refresh my setting on my reflection probe by toggling the active state from “On” to “Off” and back to “On”, we will see how that sky is now providing lighting information for my sphere.
While this is a dramatic example of how these settings can affect the materials in my scene it serves to illustrate how the lighting system in Unity 5 takes advantage of skyboxes. There are lots of settings you can tweak here to say how intense the ambient lighting will be on your scene and it’s really a bit beyond the scope of this article, so I encourage you to just experiment with the settings here and find your own happy medium.
So now that you have an idea of how to change the skybox in your scene in Unity, let’s talk for a moment about how skybox materials are made. If you look at the examples in my kit under the “skyboxes” folder, you will see that there are 17 materials listed here. Each of these materials is an instance of the Unity 5 “SkyBox/6 Sided” shader provided to you for free by the nice people at Unity. While there are many alternatives to this shader which may offer more flexibility and performance, we are going to base our work off of this one.
If you click on one of these materials you will notice that the inspector loads up a collection of 6 images that looks like this:
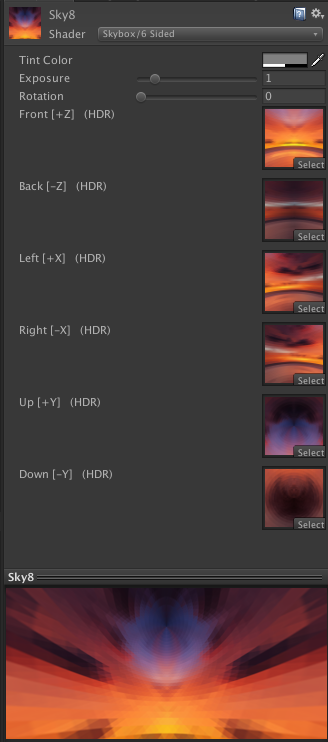
So as you can see here, there are 6 images which make up your sky and they need to be in a specific order and placement. If you pay particular attention you will see that the images themselves look warped and distorted, here is a close up of the images used in that material: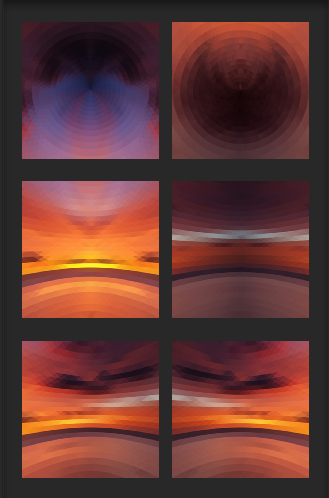
Why are these images themselves warped and distorted?
Well in order to project as a spherical world in your game, the images have to be bent and skewed in such a way that when lined up in a 6 sided cube they create a seamless sphere. Now at this point you may be thinking to yourself, how in the world am I going to make my own skyboxes if I can’t begin to make my images look like this…relax and take a deep breath, I’m going to show you the tools I use to make these very shortly, I promise.
Before we start the tutorial, there are a few other important things to look at in Unity to make these work properly. Mainly, we need to focus on the import settings of our images. Set the color mode to true color and the wrap mode to clamp. Not doing so could cause some strange artifacts in your compiled sky material, so we need to be very careful to apply these settings.

OK let’s make a skybox!
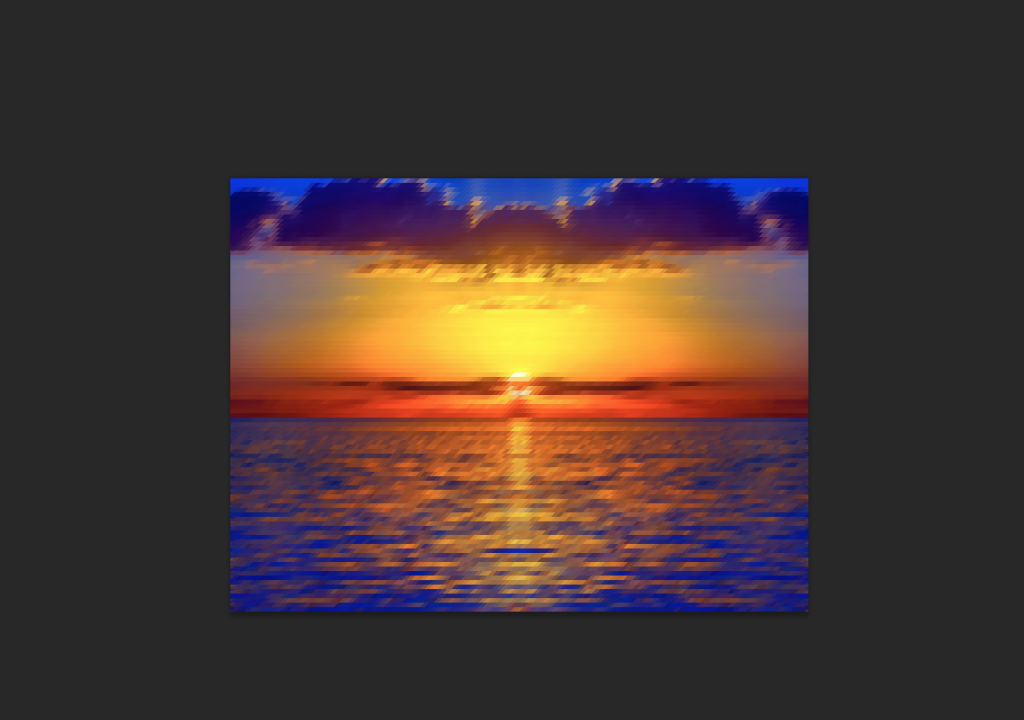
The first thing we need to do is find or take an image we want to make a skybox with. Maybe you have some pictures you took with your camera or maybe you just did a Google image search for some beautiful sunset. At any rate, you will end up deciding on an image. What’s important here is to realize what is going to provide you with the best solution for your scene. If you find an image with the horizon line too high, you will end up with a sky that provides you more of a terrain backdrop, which may be what you want, if you find an image with the horizon line too low you will end up with with a sky that feels like you are floating in the air….there is not wrong selection, just experiment. So you should have sounded an image that may look something like this.

Now I’m assuming that you have Photoshop because the next many steps we are going to take involve working with Settings in Photoshop. There may be equivalent tools available for Paint.net or Gimp but the process should apply universally.
First let’s load up our image in Photoshop
The first thing we want to do is get this image resolution down to a power of 2 ratio. So open up the Image Size tool in Photoshop and change the image to something like this:

which will result in your source image changing a bit, but don’t panic!

The next step we need to do is make our image seamless. Now there are a variety of ways you can accomplish this, but for the faceted style we will be going with here, we will take the quick and easy way by selecting exactly half of our image and mirroring it. Since we know our image is in a power of 2 ratio we should know its exact proportions, in in my case I made a 1024×768 image. So I will select my rectangular marquee tool and set its style to fixed size and set the dimensions to exactly half of the width of my image to the full height, which will in my case be 512×768

Now I will pick the side of the image I want to mirror and duplicate it into a new layer. Once that layer is created I will then select that layer and go to “Edit/Transform/Flip Horizontal” which will look like this:

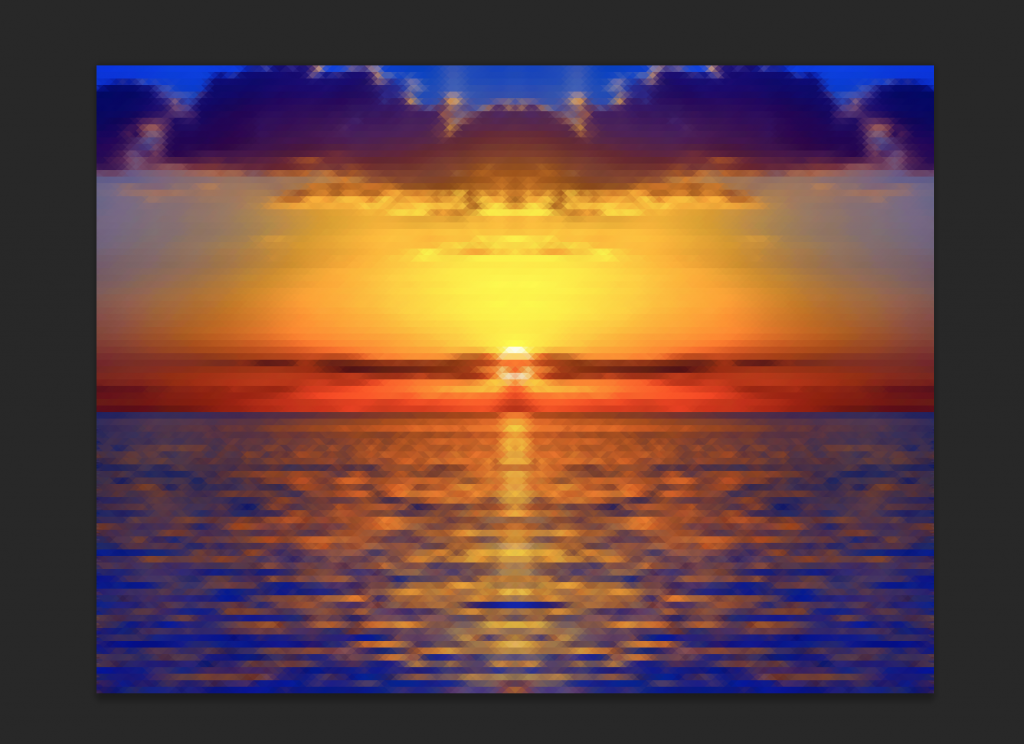
Now I will use the move tool and move that new layer into the correct position which will look like this:

Now you will see that our image has perfect symmetry and when applied as a spherical cube, will be completely seamless. If you wanted to make some adjustments at this point to remove some of the repetitions of the image, you could do so, but that’s beyond the scope of this tutorial.
If you would like some tips on how to properly make seamless images in Photoshop, you can take a look at this video on Youtube
We will now focus on adding a faceted style to our image. The first thing we want to do is merge down all of our layers into a single layer by using “Layer/Merge Layers”. This will take all of our image work up to this point and turn it into a single image layer. Now we will make 2 additional copies of this merged layer by duplicating it with “Layer/Duplicate Layer…” which will look like this:

Now select the top most layer and go into transform mode “Edit/Free Tansform”. Now, in the top toolbar you want to skew our image 45 degrees like so:

Now commit that change by hitting the Enter Key.
Next you want to go to “Filter/Pixelate/Mosaic” which will present you with a dialog something like this:

This is where you will want to experiment and get the image pixelation right for your scene. In my case Im going to go with a cell size of 8. Now, we will take our image back into free transform mode again by going “Edit/Free Transform” and skewing the horizontal plane back -45 degrees thus putting our image back the way it was, but looking like this:
Now we will select the layer immediately below and repeat the exact same steps but with the skewing order in reverse, so we will do -45 degrees first and then 45 degrees after the mosaic filter is applied.
Now select your topmost layer again and scale its opacity down to 50% like so:

which will give you an image in the view port looking like this:
Now, this is an important step, you need to select all of your layers and merge them down into a single layer.
So now we have an image of a faceted style skyline, but it’s not going to do anything special for us in Unity because it’s not yet been converted to those 6 warped images we discussed earlier. How are we going to get from where we are now, to where we need to be?
Well, there is an awesome tool you can get for Photoshop called Flexify 2 by a company called Flaming Pear which you can get here. They have a free demo which will last 30 days or you can just purchase it for $54.00 USD.
Once you install this tool, it will present a new option in your Photoshop filters list named “Filters/Flaming Pear/Flexify 2” which when loaded up will look like this:

In this tool, you want to make a few settings.
First, make sure that your
- preview is set to Best
- Grid is set to None
- Input is set to Equirectangular
- Output is set to Cube
- Glue is set to None
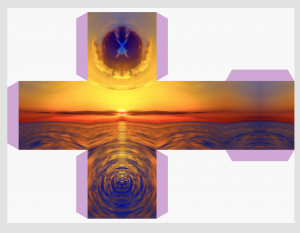
Now, you will see a preview image of your sky, laid out in a six sided cube format like this:
Next at the very bottom of the tool you will see a button that looks like this:
Click that!
Flexify will present you with a dialog asking you where you want your new files to be created, I like to use 512 pixels but you can do whatever you like:- See more at:

Now save the output images someplace you can get to them easily.
This will take you back to the Flexify dialog window and you can just click Cancel now.
The next thing we want to do is look at the images we just created and convert them from Photoshop files to png. So browse to your files, and open all 6 of them in Photoshop. You will notice that Flexify was nice enough to name the files for you with the direction they need to face. Go ahead and export these images in png format the best way you like to do so, I prefer “File/Save for the Web” and png24 format.
Now, you can delete those source PDS files and then import the folder with the PNG files into Unity by just dragging that folder into your Assets Folder in Unity, which will look like this:

Now, we want to apply our image import setting we discussed earlier by selecting all of the images shown here and setting them to true color and wrap mode clamp. (Note you can reduce your memory usage if you disable Mip Maps in the Advanced settings, thanks to Pete Sekula from Quantum Theory @qthe0ry)
The next step we will take is to make a new Material in Unity by right clicking in a blank area in the asset view panel and selecting “Create/Material”. Now change the shader selection from “Standard” to “Skybox/6 Sided” like this:

Now we will start dragging our six images into position as listed on the side.
- _b for Back
- _d for Down
- _f for Front
- _l for Right (yes these will be backwards)
- _r for Left (Again, yes its backwards)
- _u for Up
Now you will have a completed skybox materials that looks something like this:

The next thing you will want to do is drag that material into your demo scene and check it out: (Don’t forget to update your reflection probes)

Now you have successfully created your own custom faceted skybox for Unity!
Conclusion:
In this article, I harped on and on about a lot of theory behind skyboxes in Unity. I talked about how you can use Skyboxes to not only create the illusion of an endless world but how you can use the image information from that skybox to create ambient light and reflection data on your specular surfaces. Finally, I walked you through the step by step process I use to create my own skyboxes and showed you how to import that into your Scene in Unity.
Obviously, you are only limited by your own imagination here, The sky is the limit (Dad Jokes abound)!
Again, this is not the be all end all de-facto authority article on creating skyboxes. Hopefully, it has given you enough ammunition to get started on you own, and get you pointed in the right direction. There is a wide variety of topics about skyboxes and various projection methods on the internet and I encourage you to research them as well.
I would love to see some examples of the skies you create based on this tutorial. I hope you have enjoyed reading this post, I plan to write some more of them in the future.
If you have enjoyed reading this article, please like it, share it and leave your feedback in the comments section below.
This was posted . Additionally, if you would like to see some of his work as a reference, wanna support or buy some of his kits, you can find them here.
Nice blog! Is your theme custom made or did you download it from somewhere?
A design like yours with a few simple tweaks would really make my blog stand out. Please let me know where you got your design. Thanks
Thanks for finally writing about it; How to make your own Skyboxes for Unity.